8 7L. Writing JUnit Tests - 2
8.1 Project Overview
Note: You will be creating this project structure from scratch. These directories and files will not be provided to you.
.
├── src
│   └── UnitTesting
│       ├── CoOrds.java
│       └── Student.java
└── test
    └── UnitTesting
        ├── CoOrdsTest.java
        └── StudentTest.java
8.2 Detailed Instructions
In this lab, we are going to write tests for a Comparable interface implementation and learn how to structure projects.
8.2.1 Steps to Follow
- Create Source Folder
- Create a folder called
src. This folder will contain our source files.
- Create a folder called
- Create Package Folder
- Inside
src, create a folder calledUnitTesting. This represents a package calledUnitTesting. It helps to keep test classes and source classes in the same package.
- Inside
- Create CoOrds Class
- Inside the
UnitTestingpackage, create a source class calledCoOrds.javaand copy the following code into it:
package UnitTesting; public class CoOrds implements Comparable<CoOrds> { int x, y; public CoOrds() { x = y = 0; } public CoOrds(int X, int Y) { x = X; y = Y; } public int compareTo(CoOrds other) { if (x != other.x) { return x - other.x; } else { return y - other.y; } } } - Inside the
- Create Student Class
- Also inside the
UnitTestingpackage, create another source class calledStudent.javaand copy the following code into it:
package UnitTesting; public class Student implements Comparable<Student> { String name; char grade; public Student() { } public Student(String n, char g) { name = n; grade = g; } public int compareTo(Student other) { if (grade == other.grade) { if (name.charAt(0) == other.name.charAt(0)) { return 0; } else { return name.charAt(0) - other.name.charAt(0); } } else { return other.grade - grade; } } } - Also inside the
- Create Test Folder
- Create a folder called
test. This folder will contain our test files.
- Create a folder called
- Create Test Package Folder
- Inside
test, create a folder calledUnitTesting. This represents a package calledUnitTesting.
- Inside
- Create Test Classes
- Inside the
UnitTestingtest package, create two classes calledCoOrdsTest.javaandStudentTest.java. > You can copy yourCalculatorTestcontents from a previous lab here and then modify them to contain tests forCoOrdsandStudent, respectively. This is not required, but it will save you time by providing a starting point.
- Inside the
8.2.2 Project Structure
Ensure each class in this project belongs to the UnitTesting package. Your final project structure should look like this:
.
├── src
│   └── UnitTesting
│       ├── CoOrds.java
│       └── Student.java
└── test
    └── UnitTesting
        ├── CoOrdsTest.java
        └── StudentTest.java
8.2.3 Final Steps
- Run and Pass Tests
- Once your tests are passing, you can run the grading command to perform mutation testing.
- Mutation Testing
- Remember, you cannot run mutation tests via the autograder if your tests aren’t passing. Mutation testing only works on passing tests.
8.3 Rubric
- Project must compile, otherwise no grade.
- Complete JavaDoc for
UnitTesting.CoOrds(5 points) - Complete JavaDoc for
UnitTesting.Student(5 points) - No surviving mutants for
UnitTesting.CoOrdsTest(20 points) - No surviving mutants for
UnitTesting.StudentTest(20 points)
Submissions will be manually reviewed by TAs. Your grade may change as a result.
8.4 Project Files
8.5 Opening Project in Visual Studio Code
Download the project files from
Unzip the files to preferably an
ITSC 2214folder for this class. You must have created this folder before for previous labs.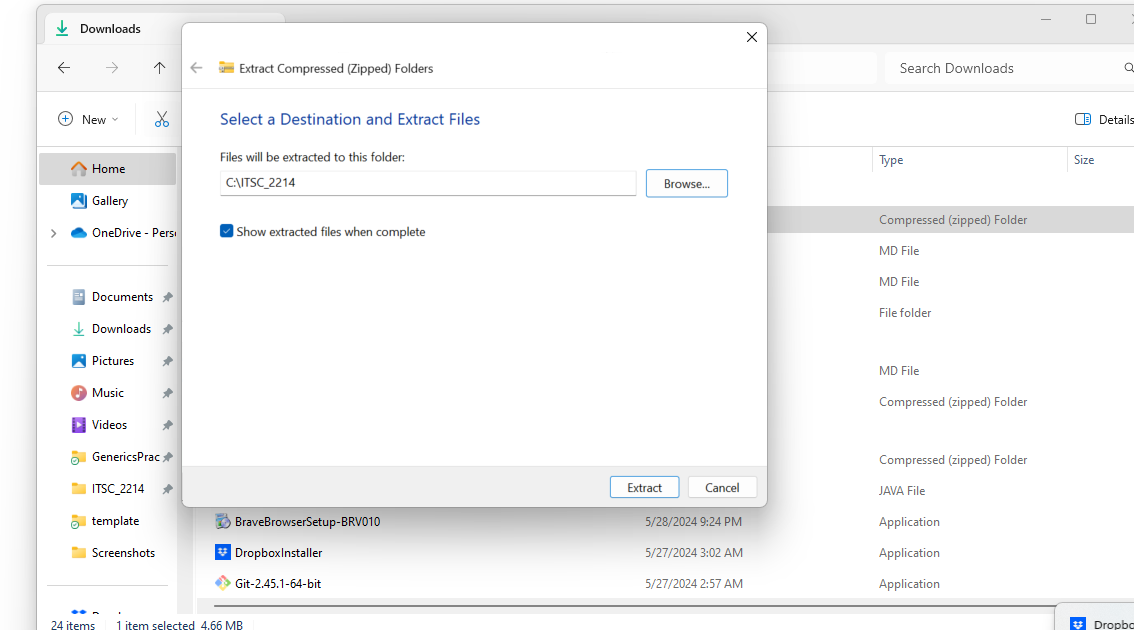
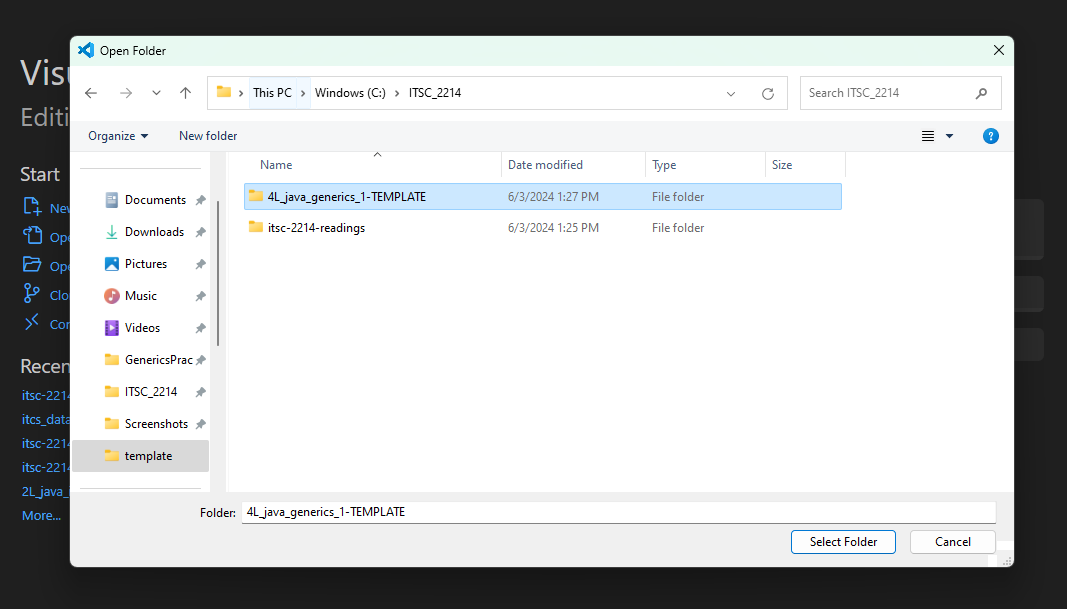
Launch Visual Studio Code. Go to File > Open Folder…, navigate and select the folder where you have extracted the zip file.
8.6 Update the autograder
First, please update your autograder by running:
umm update8.7 Checking Autograder Feedback
You can check your grade locally by following these steps:
Open a terminal. To open a terminal in Visual Studio Code on different operating systems:
Windows: Press ” Ctrl + ` ” or ” Ctrl + Shift + ` ” to open the integrated terminal.
Mac: Press ” Cmd + ` ” or ” Cmd + Shift + ` ” to open the integrated terminal.
Run the command:
umm grade ./script.rhai
8.8 Submitting your Project
When you are ready to submit your assignment:
Open a terminal. To open a terminal in Visual Studio Code on different operating systems:
Windows: Press ” Ctrl + ` ” or ” Ctrl + Shift + ` ” to open the integrated terminal.
Mac: Press ” Cmd + ` ” or ” Cmd + Shift + ` ” to open the integrated terminal.
You can copy and run the
umm create-submissioncommand in the terminal, and that should create a zip file with a name similar tosubmission-2024-01-24-15-04-50.zip.umm create-submissionSubmit the
submission-2024-... .zipfile to Gradescope. The submission zip file will appear in the file explorer tab of VS Code. You can right click on this file and click on reveal in explorer (windows) or reveal in finder (mac) in order to find this file. then, you can drag and drop this to gradescope for submission.